Wednesday, March 28, 2012

Pretzel Bites


These pretzel bites were a surprise baking event this past weekend. You see, I am on a quest to make a white chocolate cookie. There are a ton of recipes out there for white chocolate chip/chunk cookies or white chocolate macademia nut, but what I want is a cookie with the white chocolate in the batter. I had an epic failure this weekend trying to adapt a recipe for chocolate cookies into white chocolate (batter baked too thinly, scraped directly into the trash failure). In the course of attempting to make those, I did the math wrong and ended up with an extra half cup of melted butter. What to do with extra melted butter? Make pretzel bites of course!

My pretzel bites are adapted from a Country Living recipe. The original recipe called for rolling them into pretzel shapes, which my sister and I have done before. I decided that was too tedious, and that they would taste just as awesome in little pretzel ball form. For more tips on what "smooth and elastic" dough should look like, see my posts on Crusty French Rolls and Pizza Crust.

Pretzel Bites (approximately 25 golf ball sized bites)

1 1/2 c. warm water (about 110F)
1 package active dry yeast (2 1/4 tsp.)
1 tsp. brown sugar
4 c. bread flour
2 tsp. salt
4 Tbs. butter (melted) (1/2 stick)
1 Tbs. molasses
4 c. water
1/4 c. baking soda
2 Tbs. butter (melted)
2 Tbs. Kosher salt (the chunky kind of salt)

In a 2 c. liquid measuring cup, combine the yeast, water, and brown sugar, stirring to dissolve, and let stand until foamy, about 5 minutes. In the bowl of a stand mixer fitted with a dough hook, whisk (by hand) together the flour and 2 tsp. salt. Add the half stick of melted butter, the molasses, and the yeast mixture. I usually stir with a wooden spoon just to get everything sort of incorporated before I turn on the mixer.

Knead the dough with the mixer for 8-10 minutes, or until the dough is smooth and elastic. The dough will smack against the sides of the bowl and the bowl will be left pretty clean by that point. With floured hands, pull the dough off of the hook and pull and tuck it into a smooth ball.

Grease a glass bowl (I just use cooking spray), and place the ball of dough upside down, then turn it right side up so that the top of the dough is greased. Cover loosely with plastic wrap and set in a warm, draft-free place to rise. Since I was attempting (and failing) to bake cookies, I just let it rise on top of the heated oven. You will want to let it rise until it doubles in size, which depending on various factors will take roughly an hour.

Preheat the oven to 400F. Punch down the dough. You could put it back into the stand mixer, but at this point I usually just find it easier to knead by hand. You will want to knead the dough for about 5 minutes on a lightly floured surface. So as to keep clean-up easy, I tend to flour either an old plastic placemat or one of those flexible cutting boards, and then that goes into the sink, rather than working directly on the countertop.

Tear off pieces of dough and roll them in your hands until they are about the size of golf balls. Set them on a floured surface, lightly mist with cooking spray, and cover loosely with plastic wrap. Let the balls rise for 15 minutes.

While the dough is rising, bring the 4 c. water and 1/4 c. baking soda to a boil in a saucepan. Alternatively, you can use a large stockpot and double the proportions. Drop the pretzel balls into the boiling water for about 45 seconds, turning them throughout. Using a strainer, place the poached bites onto a parchment-lined cookie sheet. Using a pastry brush, coat the pretzel bites with melted butter, and liberally sprinkle with the Kosher salt. Bake for approximately 15 minutes, or until they are golden-brown.

You can serve these with various kinds of sauces (I think a cheddar-based sauce would be delicious), but I prefer them plain or dipped in a little melted butter.

Thursday, March 22, 2012

Stovetop Style Mac & Cheese


Macaroni and cheese is one of my favorite comfort foods. I experimented with various recipes for years before I settled on the one below, which is adapted from EatingWell's recipe. Most homemade mac & cheese recipes all involve cooking the pasta on the stove, tossing it in a casserole dish, pouring cheese sauce over it, and topping it with some sort of breadcrumb. I don't care for those recipes for two reasons: 1) I'm terribly impatient, and having to wait for water to boil, pasta to cook, and the dish to brown/bubble in the oven takes entirely too long and 2) I'm in the "al dente" camp when it comes to pasta, and this means that for me, even undercooking the pasta on the stove, the post-oven pasta is too mushy and not properly chewy.

The fun thing about macaroni and cheese is that it is customizable. You can eat it plain, like the first photo above. You may or may not try dabbing it in a little BBQ sauce (yes, I know I'm crazy). Alternatively, you could caramelize some onions and mix them in (second photo above). Caramelized onions take mac & cheese to an entirely new level. I was out of town last weekend, and so I had very few veggies in the fridge, but adding peas or asparagus or broccoli to the pasta water 3-4 minutes before the pasta is done is an easy way to sneak in veggies.

A note about caramelizing onions. I swear, every recipe I see online says this takes 20 minutes. I have never in my life been able to caramelize onions in under an hour. I slice them thinly, toss them in olive oil, and let them cook over medium-low heat in a nonstick saute pan, stirring occasionally, until they are are an oh so delicious caramel color. Theoretically, I suppose you could speed up the process by adding extra sugar, but I've never seen the point.

I also learned something new about caramelizing onions this week. If you put a saute pan on, and the onions have cooked for 30 minutes and are translucent, perhaps slightly brown, all is not lost if one of your best friends guilt-trips you into leaving your perfectly cozy kitchen to get killed at trivia night at a local pub. I put the onions in a covered glass bowl in the fridge, and when I got home I put them into a saute pan over medium-low heat and they finished caramelizing just fine. This might come in handy if you were planning to serve them for a dinner party and wanted to pre-cook them so that they wouldn't take so long before dinner.

Stovetop Style Mac & Cheese

1 box (about 2lb) of pasta*
3 c. 2% milk
1/2 c. 2% milk
6 Tbs. flour
1 tsp. garlic salt
1/2 tsp. ground white pepper
1/2 tsp. nutmeg
1 tsp. ground mustard
8 oz. (2 cups) shredded sharp cheddar**
2 oz. (1/2 cup) shredded Parmesan

Optional Add-ins: chopped broccoli, peas, chopped asparagus, caramelized onions, sautéed tomatoes, etc.

Cook your pasta according to the package directions. If you are adding broccoli, peas, or asparagus, just add them to the pasta water a few minutes before the pasta is done.

Meanwhile, heat the 3 c. milk in another large saucepan over medium until little bubbles form around the edges and it is steaming. You want it just below a simmer, but you absolutely do not want it to boil. In a liquid measuring cup, whisk together the remaining 1/2 c. milk, flour, garlic salt, white pepper, and mustard. Slowly whisk in this mixture to your original pot of milk. Continue to cook, whisking constantly, for about 5 minutes until the mixture has thickened. Whisk in the cheddar and Parmesan. Pour over the drained pasta (or pasta with veggies) and stir.

*I used 1/2 box Barilla Plus Rotini and 1/2 box Barilla Whole Grain Rotini, so that I get both protein and whole grain. The Plus will add a slightly nuttier flavor (which I happen to prefer), but their Whole Grain has a taste and texture that I find indistinguishable from regular pasta.

**You may be tempted to use 2% milk reduced fat sharp cheddar. I have tried that before, and it just doesn't melt properly. The texture of the cheese sauce will be stringy and grainy, so stick with the full-fat cheese instead.

Friday, March 16, 2012

Leftover Pork BBQ Sandwiches


So, I roasted a 4 pound pork loin this week. At the time, I sliced half of it to eat for leftovers, and the other half I sliced into narrow, thin strips/chunks, about 2inx2inx7in. I promptly put said chunks into the freezer because I didn't know when I'd have time to cook again and I didn't want them going bad before I could use them. Well, this afternoon, I ran out of leftovers, and I unexpectedly had some extra time on my hands.

After much googling, pork barbeque seemed like the best (i.e. tastiest/easiest) option for my leftover roast. I highly recommend a food processor for this recipe, as I'm not entirely sure of the best way to shred roasted pork by hand. Normally, I prefer Bull's Eye Original for my barbeque sauce (described to me by a friend at one point as the grown-up version of ketchup), but I had an open bottle of Sweet Baby Ray's in the fridge, so that's what I used.

Leftover Pork BBQ Sandwiches

6 sandwich rolls, and I highly recommend making Crusty French Rolls
~ 3 c. roasted pork loin (mine was leftover from this)
1 Tbs. olive oil
1 large sweet onion, cut into sixths
4 cloves garlic, peeled and smashed
1 3/4 - 2 c. BBQ sauce
salt and pepper to taste

I defrosted my hunks of pork tenderloin while I was making the rolls. Place the onion and garlic into the food processor with the chopping blade and pulse until they are finely diced, but not liquid. Meanwhile, heat the olive oil in a large saute pan until a sprinkle of water sizzles and dances across the surface. Add the onion and garlic mixture to the oil and cook until the onions are translucent, but not browned.

While the onion mixture is cooking, swap the chopping blade for the shredding/grating disk in the food processor. While the food processor is running, use the food chute to push the strips/hunks of pork through the processor until they are shredded. Add the now-shredded pork loin to the saute pan to heat through. Mix in the BBQ sauce, and simmer on medium-low for about 20 minutes, until heated through and well-flavored. Add salt and pepper to taste. Serve about 1/2 c. of pork mixture per roll.

Thursday, March 15, 2012

Crusty French Rolls


I love bread. I also don't eat bread quickly enough to keep any in the house, so on the days when the cravings get really bad, I make my own. I have been experimenting with dinner roll recipes for several years, trying to find the perfect one. I don't think these are perfect, but they're getting close. They also make amazing sandwich rolls. Hard and crusty on the outside and amazingly soft and chewy on the inside. I may have burnt my tongue because I didn't let them cool before I had to eat one. They are that good. The impetus for my bread-baking this time around was some leftover pork I was hoping to turn into BBQ pork (that will be another post), which, naturally, requires a sandwich roll on which to put it.

While I suppose you could make these by hand, that would be a lot of kneading. Fortunately, I have a KitchenAid, which I absolutely adore, and it makes kneading bread a breeze. I halved the recipe because these rolls will turn rock solid very quickly. If you don't intend to eat them in a day or two, I would freeze the remainder to take out as needed. A full recipe makes 16, but it is fairly easy to halve such that you will have 8. Note that when you halve the recipe, your rising times will also decrease.

Crusty French Rolls (from Country Living)

2 pkgs. active dry yeast
2 1/2 c. warm water (about 110F)
6 1/2 to 7 1/2 c. bread flour
1 Tbs. salt
2 Tbs. cornmeal

In a large liquid measuring cup, stir the yeast into the water with a plastic spoon and set off to the side to stand for 5 minutes. In order to get the water the proper temperature (yeast are temperamental), I run the faucet and stick a thermometer into the stream and play with it until I get it to about 110F, and then I fill my measuring cup. That's much less frustrating than filling and measuring multiple times.

Add 4 c. flour and salt to the bowl of a stand mixer and turn it on stir (using the paddle attachment) for about a minute. Alternatively, you could whisk the flour and salt together. Once the yeast have foamed a bit on the top (about 5 minutes), pour the yeast mixture into the flour and salt. Beat with an electric mixer (paddle attachment) on medium-low (I think mine was at 2) for 10-15 minutes until the dough pulls away from the sides of the bowl and the paddle appears to "cut" through the mixture so to speak. Pictures below help illustrate that. You might think this is a long time; my advice is to set a timer for 10 minutes and then walk away, rather than compulsively watching the dough come together, wondering if it is done. After 10 minutes, you can start staring at it to determine when it has reached the proper soft dough stage.


Take the paddle out and let the dough "rest" for 10 minutes. This translates to set a timer and walk away from the yummy, yeasty smell. Put the dough hook on the mixer and turn it to medium-low (I set it on 2). With the mixer running, slowly pour the remainder of the flour in and knead for an additional 5 minutes, until the dough looks smooth and elastic. Smooth and elastic is a bit of a term of art in the dough world, but hopefully the pictures below will help clarify. You will need to speed the mixer up to medium or so (I put my KitchenAid on 4 for this stage). The dough is going to smack against the side of the bowl. Do not be alarmed. At the end of 5 minutes, you want the dough to look like the pictures below.


Grease a large glass bowl (a spray of Pam usually does the trick). Take the dough out of the mixing bowl and form it into a ball with slightly floured hands. The best way to do this is to pull little pieces and tuck them underneath until you get a smooth ball. Place the ball upside-down into the bowl and then flip it so that the round smoothness is on top and oiled.


Cover lightly with plastic wrap and set in a warm, draft-free place to rise. I usually turn my oven on warm, let it heat, and then turn it off and place the bowl in there. Alternatively, you can place a pan of very hot water on a lower rack and then place the bowl of dough on top. If, for instance, it is Thanksgiving and your oven has been going for 3 days straight, another good technique is to fill a 9x13 pan with steaming water, place a wire rack over it, and set the bowl on top of the wire rack.

You want to let the dough rise until it is doubled in bulk, which for a full recipe will take about 2 hours, and for a half recipe in my warm oven takes about an hour. Then you will punch the dough down. Take a fist and push it into the middle so that all of the air comes out. Push around the dough to eliminate any air bubbles, and reform it into a ball to rise again. The second rise will go faster, again until doubled in bulk, which will be about 1 1/2 hours for a full batch and about 45 minutes for a half batch.

Water in the oven is what creates the crusty outside deliciousness on these rolls. Fill a 9x13 pan with water, and place it in the bottom of the oven. Preheat the oven to 450 degrees. Take your dough that has now finished its second rise, and divide it into equal parts (8 for a half-batch, 16 for the whole). Sprinkle a cookie sheet with the cornmeal. Tuck the sides of each roll under until you have little rounded lumps, and cover loosely with greased plastic wrap. Let the rolls rise while sitting on top of the preheating oven for 30 minutes. Take a very, very sharp knife and slice across the top of each roll. Place the rolls in the oven and bake until golden brown, about 20-25 minutes.

Monday, March 12, 2012

Roasted Pork Tenderloin with Apple Cider Risotto


As I may have mentioned, I am a picky eater. I am just now reintroducing pork into my repertoire, which is a big step for me as I still won't go near ham or bacon. Pork tenderloin was on sale at Kroger a few weeks back for $1.99/lb, so I picked one up for the freezer and decided I would try my hand at it.

Clockwise, you have the Roasted Pork Tenderloin, the Apple Cider Risotto, some roasted apples and onions, and some broccoli (I decided I needed something green). The pork is drizzled with a balsamic reduction.

The original recipe from which I started, courtesy of Martha Stewart here, called for the reduction to be used as a glaze. I'm sure that would be delicious, but I intended to repurpose half of the half loin and did not want the balsamic flavoring if I turn it into a BBQ pork sandwich (as a single person, I cannot eat 4 pounds of roasted tenderloin without getting totally bored, no matter how amazing it is). I ended up slicing about half of it to go with the risotto, and I put the other half in the freezer to be repurposed at a later date.

The risotto recipe was actually inspired by another lovely cooking blog, How Sweet It is, where she posted a beer risotto last month. I, unfortunately, do not care for beer, but immediately thought of doing an apple risotto with hard cider instead of beer. The result was absolutely delicious, and I imagine that if one loves bacon (sadly, I do not), a little bacon or pancetta crumbled in would make it even better.

Roasted Pork Tenderloin with Apples and Onions

Glaze (or drizzled topping):
1/4 c. balsamic vinegar
2 Tbs. maple syrup

Pork Tenderloin:
Salt and Pepper
1 4lb boneless half pork loin
1 Tbs. olive oil
2 medium apples (look for a tart, baking apple)
1 large sweet onion

Preheat the oven to 450F. I covered my pork loin liberally with salt and pepper and placed it on a rack in a roasting pan. Peel and core the apples, and then slice them into 8 wedges each. Slice the onions vertically so that you get strips approximately 1/2 inch wide. Toss the apples and onions with olive oil, salt, and pepper, and place them in a jellyroll pan.

I put the apple/onion mixture and the pork loin into the oven at the same time. I cook my meat by temperature, rather than by time. I took the apples and onions out after about 15 minutes, and put them in for the last 10 minutes or so, until they were golden brown. I cooked the pork until it hit 160F and then let it rest for 10 minutes after removing it from the oven. I think it took about an hour, but that probably depends on the size of your cut of meat and how well your oven heats. I probably overcooked my meat, but I'm one of those crazy people who eats even filet mignon butterflied and well.

While the pork and vegetables were cooking, I combined the balsamic and maple syrup in a small saucepan and boiled them together, stirring frequently, until they had reduced by about half. I then let the syrup cool and drizzled it over the sliced meat. Warning: make sure to hold your breath and look away from the reduction (or close your eyes) while stirring. Vinegar fumes singe the eyes and nose, as I learned the hard way. Put it on a back burner and turn on the range fan.

Also while all of this was going on, I started my risotto, which finished right before the pork came out.

Apple Cider Risotto

2 Tbs. olive oil
4 garlic cloves, minced
1 1/2 c. arborio rice
1 large tart cooking apple, finely diced
1 Tbs. lemon juice (to prevent browning)
1 large sweet onion, finely diced
12 oz. hard cider (I used Hornsby's since it was in the fridge, but any will probably do as long as you like to drink it)
3 c. chicken stock (by which I cheated and used 3 c. of boiling water mixed with two chicken bouillon cubes) (you could also use vegetable if you wanted to do a vegetarian version)
1/4 c. freshly grated parmesan cheese
Salt and pepper to taste

Pour oil in a large, deep skillet and heat over medium heat until sprinkled water dances across the surface. Add in the garlic, and cook for about 30 seconds, stirring to prevent burning. Add in the rice, and cook for about 3 minutes, stirring constantly so that the rice gets thoroughly coated with the oil. Add in your apple mixed with the lemon juice and onion, and cook for another 2 minutes or so, until the juice has been cooked out.

Pour in the cider in thirds, waiting until all of the liquid is absorbed before adding more, stirring very frequently. Continue adding chicken stock by the half cup, waiting until each pour is nearly completely absorbed before adding more and continuing to stir frequently. At this point it becomes more of an art than a science. Taste test to see if the rice is pleasantly chewy or if it's still crunchy (one is done, the other is not). You may need more or less liquid; I actually ended up adding a 1/4 c. of water at the end because my rice was just a little too firm for my taste by the time I'd used up all of my stock.

Once the rice is to your preferred texture, stir in the parmesan and salt and pepper. Like I mentioned before, I imagine that if one liked bacon, this would be delicious with some bacon crumbled in.

Saturday, March 10, 2012

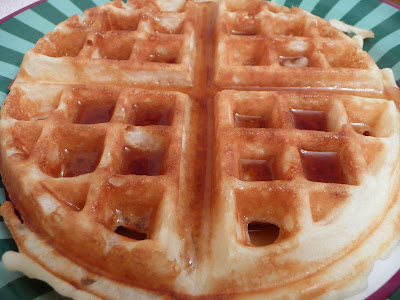
Waffles


Apologies, but I was out of town skiing in Whistler. I made these lovelies before I left, topped with a little maple syrup. What I actually did was mix all of the dry ingredients and store them in an airtight container for a few days until I had a morning slow enough to be able to make them. The recipe made 7 waffles in my Belgian waffle maker. With the leftovers, you let them cool, and then place them in the freezer in a Ziploc. The following morning, you just pop one straight from the freezer into the toaster (or in my case, toaster oven) until they are hot and crispy. Homemade eggo's, essentially. This is not a light recipe, but it is a wonderful indulgence. I will continue to experiment with other recipes to find something a bit lighter for day-to-day breakfasts.

Waffles (from Southern Living)

2 1/2 c. all-purpose flour
1 Tbs. + 1 tsp. baking powder
3/4 tsp. salt
1 1/2 Tbs. sugar
2 large eggs
2 1/2 c. milk
3/4 c. vegetable oil

Combine the flour, baking powder, salt, and sugar in a large bowl. Stir until thoroughly combined. Combine all of the wet ingredients (eggs, milk, oil) and whisk them together in a large measuring cup. Pour the wet ingredients into the dry ones, and stir with a whisk until everything is moistened. The batter will still be a little lumpy, and it will make some bubbling sounds. I used about 3/4 cup of batter per waffle in my belgian waffle maker, and I had to turn the cook time (it has an automatic timer) up one more than I usually do to get them appropriately brown and crispy.